
Views: 0 Author: Site Editor Publish Time: 2025-10-07 Origin: Site


Imagine displaying your jewelry in a way that captivates and protects. A well-designed jewelry display cabinet enhances the allure of your pieces while ensuring their safety. Building your own custom jewelry display case allows you to tailor the design to your needs and style. In this post, you'll learn how to choose materials, design, and construct a stunning display cases for jewelry collection.
When building a jewelry display case, selecting the right materials is crucial. It affects the look, durability, and security of your case. Let's explore some key material options.
Plexiglass and glass both work well for display cases but differ in properties:
Plexiglass: Lightweight, shatter-resistant, easy to cut and glue. Ideal for DIY projects. It offers good clarity but scratches easier than glass.
Glass: Heavier, more scratch-resistant, and gives a high-end look. Cutting glass requires special tools and skills. It is more fragile but offers superior clarity and durability.
If you want a safer, easier-to-handle material, plexiglass is the way to go. For elegance and scratch resistance, glass is better but requires careful handling.
Wood forms the base and frame, so choosing the right type matters. Common options include:
Pine: Affordable, easy to work with, and light. It may dent or scratch more easily.
Oak: Strong, durable, and has a beautiful grain. It’s heavier and more expensive.
Maple: Hard, smooth finish, and resistant to wear. It’s great for a polished look.
Cherry: Rich color and fine grain. It darkens over time, adding character.
Pick wood that matches your style, budget, and skill level. Hardwoods like oak or maple offer durability and a refined look, while pine is great for beginners.
Having the right tools ensures your project goes smoothly. Some essentials include:
Measuring tape and pencil: For precise measurements and marking.
Saw: A band saw or circular saw for cutting wood and plexiglass.
Sandpaper: To smooth wood edges and plexiglass after cutting.
Glue: Wood glue for frames and methylene chloride glue for plexiglass.
Clamps: To hold pieces tight while glue dries.
Drill and screws: For assembling frames and attaching hardware.
Router (optional): For creating grooves to hold glass or plexiglass panels securely.
Using proper tools improves accuracy and the final finish of your display case.
Tip: When choosing plexiglass or glass, consider your display location—plexiglass suits high-traffic areas for safety, while glass enhances elegance in low-risk environments.
Designing your jewelry display case is a crucial step that sets the foundation for a functional and attractive showcase. Thoughtful design ensures your jewelry is well presented and the case fits perfectly in your space. Let’s explore how to determine size and shape, sketch your design, and consider customization options.
Start by measuring the jewelry pieces you want to display. Consider the largest items plus some extra room for smaller pieces and spacing. A good rule is to add 2 to 4 inches around your items to avoid overcrowding.
Think about where the case will sit. Will it be on a countertop, wall-mounted, or freestanding? This affects the case’s height, depth, and width. Common shapes include rectangular or square, but you can also opt for a curved or multi-level design to add visual interest.
For example, a countertop case might be 24 inches wide, 12 inches deep, and 18 inches high. A wall-mounted case could be slimmer but taller. Sketching your space helps you visualize the best fit.
Put your ideas on paper before building. Draw the case from different angles: front, side, and top views. Include measurements for each part — base, panels, frame, and any shelves or compartments.
Sketch details like where the plexiglass or glass will go, how the doors open, and where locks or hinges will be placed. This helps identify potential issues early and guides your cutting and assembly.
Use graph paper or a digital tool for accuracy. Label each piece clearly. You can also add notes about materials or finishes you plan to use.
Customization lets your display case stand out and better suit your needs. Some options include:
Compartments or trays: Add sections to separate necklaces, rings, or bracelets.
Lighting: Integrate LED strips or spotlights to highlight jewelry.
Mirrors: Place mirrors inside the back panel to enhance visibility and depth.
Locks: Include secure locks for valuable pieces.
Decorative finishes: Use stains, paints, or veneers to match your decor.
Think about your personal style and the ambiance you want. A rustic wood finish creates warmth, while sleek black or white paint offers a modern look.
Keep in mind your skill level and tools available. Some custom features may require advanced woodworking or electrical work.
Tip: When sketching your jewelry display case, always double-check your measurements against the actual jewelry and space to avoid costly mistakes during construction.
Creating a sturdy and attractive base is the foundation of your jewelry display case. It supports the entire structure and sets the tone for the look and feel of the case. Here’s how to cut, assemble, and finish the wooden base, plus how to add a plinth for extra stability.
Start by measuring the dimensions for your base based on your design. Use a saw—circular or table saw—to cut the wood pieces precisely. Typically, the base consists of a flat bottom panel and side supports.
Cut one large flat piece for the bottom. Make it slightly larger than the frame to provide a solid foundation.
Cut side pieces that will attach to the bottom, forming a box-like structure. These sides give height and support to the display case.
Sand all edges smoothly to avoid splinters and ensure a clean fit.
Assemble the base by applying wood glue along the edges where the sides meet the bottom piece. Use clamps to hold pieces tightly while the glue dries. For added strength, secure the joints with finishing nails or screws.
Once the base is assembled and the glue has dried, it’s time to finish the wood. Staining enhances the wood’s natural grain and adds color that matches your style.
Choose a wood stain color that complements the jewelry and your décor.
Apply the stain evenly with a brush or cloth, following the wood grain.
Let the stain soak in for a few minutes, then wipe off excess with a clean cloth.
After the stain dries, apply a clear polyurethane finish to protect the wood and give it a smooth, glossy look.
Allow the finish to cure completely before handling.
This finishing process not only beautifies the base but also protects it from moisture and wear.
A plinth is a wooden platform that raises and stabilizes the entire display case. It can also add an elegant touch and make the case easier to move or place on uneven surfaces.
Cut a plinth slightly larger than the base of your case.
Sand and stain it to match the base.
Attach the base securely to the plinth using wood glue and screws.
Ensure the plinth is level and sturdy to prevent wobbling.
Adding a plinth helps distribute the weight evenly and prevents tipping, especially for taller or heavier cases.
Tip: When assembling the wood base, always clamp pieces firmly during glue drying to maintain perfect alignment and avoid gaps in joints.
Creating the frame and panels is a crucial step in building your jewelry display case. This part holds the plexiglass or glass that showcases your jewelry while protecting it. Let’s break down how to cut the panels, assemble the frame, and glue everything securely.
Start by measuring the exact dimensions for each panel based on your design. You will typically need pieces for the front, back, and sides of the case.
For plexiglass, use a band saw or circular saw with a fine blade to cut the panels. Keep the material steady to avoid cracks or uneven edges.
After cutting, smooth the edges with fine sandpaper to prevent sharpness and ensure a neat fit.
If using glass, cutting requires special glass cutters and safety precautions. It’s often best to have glass cut professionally to avoid breakage.
Accuracy here is key. Panels that don’t fit well can cause gaps or stress points, weakening the structure.
Once your panels are ready, assemble the wooden frame that will hold them.
Cut the wood pieces for the frame according to your design dimensions.
Use wood glue and clamps to join the frame pieces at precise 90-degree angles.
Reinforce corners with small finishing nails or screws for extra strength.
If your design includes grooves or channels, use a router to create slots where the panels will sit snugly.
A well-assembled frame provides stability and a professional look.
With the frame ready, it’s time to attach the plexiglass or glass panels.
Use methylene chloride glue for plexiglass, applying it carefully along the edges where panels meet.
Hold pieces firmly in place until the glue sets, using clamps if necessary.
For glass, use clear silicone adhesive or special glass glue to secure panels to the frame.
Dry fit the top panel before final gluing to ensure a perfect fit.
Allow all glued joints to dry completely before moving the case.
This step seals the case, protecting your jewelry from dust and damage.
Tip: When gluing plexiglass panels, apply glue sparingly and evenly to avoid visible residue and ensure strong, clear bonds.
Securing your jewelry display case is essential to protect valuable items from theft or damage. Adding features like locks, hinges, and safety measures ensures your display is both accessible and secure. Here’s how to incorporate these elements effectively.
A lock adds a strong layer of security, preventing unauthorized access. Consider these options:
Cam locks: Simple to install, cam locks secure the door or lid with a rotating latch. They are cost-effective and reliable.
Magnetic locks: Hidden and sleek, magnetic locks offer a clean look but require precise installation.
Keyed cabinet locks: Provide traditional security with a key, suitable for high-value jewelry.
To install a lock:
Choose a lock compatible with your case design.
Mark the location on the frame or door where the lock will sit.
Drill holes for the lock body and latch.
Attach the lock using screws or mounting hardware.
Test the locking mechanism to ensure smooth operation.
Locks not only secure your jewelry but also add professionalism to your display.
Hinges allow easy access to your jewelry while keeping the case closed securely. Select hinges that match your case style and size:
Butt hinges: Common and sturdy, ideal for heavier doors.
Piano hinges: Run the full length of the door, distributing weight evenly.
Concealed hinges: Invisible from the outside, for a clean look.
Installation tips:
Position hinges evenly on the side of the door.
Pre-drill screw holes to prevent wood splitting.
Use screws that fit your wood thickness.
Check door alignment after installation to avoid gaps.
Hinges should open smoothly without wobbling or sagging.
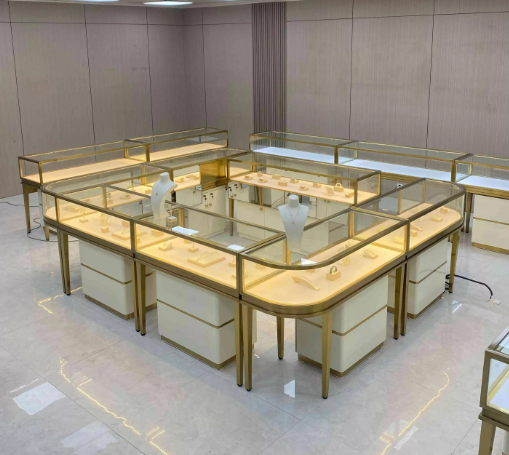
Beyond locks and hinges, consider these safety features:
Soft interior lining: Use velvet or felt to cushion jewelry and prevent scratches.
Secure shelving or inserts: Prevent items from shifting or falling.
Tempered glass or thicker plexiglass: Adds impact resistance.
Proper ventilation: Avoid moisture buildup that can damage metals or stones.
Regularly inspect your case for loose hardware or wear and repair promptly to maintain security.
Once your jewelry display case is fully assembled, polishing and cleaning it enhances its appearance and ensures your jewelry shines. Use a soft, lint-free cloth to wipe down all surfaces. For plexiglass panels, avoid harsh chemicals; instead, use a mild soap and water solution or specialized plexiglass cleaner to prevent scratches. For wooden parts, apply a gentle wood polish or a microfiber cloth to bring out the wood’s natural luster. Clean both inside and outside thoroughly to remove dust, fingerprints, and smudges.
How you arrange jewelry inside the case influences customer attention and sales. Start by grouping similar items together—necklaces, rings, bracelets, and earrings. Use small stands, trays, or cushioned inserts to keep pieces upright and organized. Vary heights and layers to create visual interest; for example, place taller necklace busts at the back and smaller rings or earrings in front. Leave enough space between items to avoid clutter and allow each piece to stand out. Rotate displays regularly to keep the presentation fresh and engaging.
Proper lighting transforms your display case, highlighting jewelry’s sparkle and color. LED lights are a popular choice—they emit minimal heat, consume less energy, and come in various colors and intensities. Position LED strips along the top or sides inside the case for even illumination. Adjustable spotlights can focus on featured pieces, creating dramatic effects. Avoid overly harsh or warm lighting that can distort jewelry colors. Consider installing a dimmer switch to control brightness based on the time of day or ambiance.
Tip: Regularly clean lighting fixtures and replace bulbs promptly to maintain optimal brightness and ensure your jewelry always looks its best.
Building a jewelry display case involves selecting materials like plexiglass or glass, choosing wood types, and using essential tools. Custom-built cases offer durability, elegance, and a personalized touch, enhancing jewelry presentation. Showcasing craftsmanship in a display case not only highlights your skills but also provides a unique and appealing way to present jewelry. HZdisplay offers products that ensure your craftsmanship shines while providing security and style for your jewelry displays.
A: Plexiglass and glass are popular choices for display cases for jewelry. Plexiglass is lightweight and shatter-resistant, ideal for DIY projects, while glass offers superior clarity and a high-end look.
A: Incorporate locks, such as cam or magnetic locks, and use sturdy hinges for accessibility. Ensure the safety of displayed jewelry with soft interior lining and secure shelving.
A: Essential tools include a saw, measuring tape, sandpaper, glue, clamps, drill, screws, and optionally, a router for creating grooves to hold panels securely.


