
Views: 0 Author: Site Editor Publish Time: 2026-09-09 Origin: Site


Retail floor space is expensive. The center of your sales floor holds the highest potential for 360-degree customer engagement, yet many store owners leave it empty or fill it with poorly planned fixtures. You face a constant battle between creating an open, inviting layout and maintaining strict security protocols. Poorly placed central fixtures create traffic bottlenecks, block security camera sightlines, and frustrate your sales staff during peak hours. Deploying an island jewelry display cabinet transforms dead central space into a high-converting focal point. This strategy only works if your store footprint, fixture shape, and hardware specifications align with your daily operations. We will break down exactly how to evaluate your floor plan, select the right configurations, and specify the technical hardware needed to maximize your retail environment without compromising security or traffic flow.
Space Requirements Dictate Viability: Island cabinets require specific square footage and minimum clearance aisles (typically 36 to 42 inches) to maintain ADA compliance and comfortable traffic flow.
Configuration Drives Workflow: Shape selection—whether a U shaped jewelry display cabinet or a fan shaped jewelry display cabinet set—directly impacts how many staff members are required to operate the station and how securely they can access inventory.
Infrastructure is Critical: Freestanding center-floor fixtures require pre-planned electrical routing (core drilling or floor tracks) for integrated LED lighting and electronic locking mechanisms.
Customization Mitigates Risk: Partnering with a specialized jewelry display cabinet manufacturer ensures the integration of shatter-resistant glass, concealed hardware, and brand-aligned finishes that modular, off-the-shelf units often lack.
Positioning a central fixture correctly captures the immediate line of sight. Customers form their first impression within seconds of entering a retail environment. A well-placed jewelry store island showcase aligns with the natural gaze of the buyer as they step out of the entrance decompression zone. It establishes immediate brand authority and guides the customer's initial steps toward your highest-margin collections. Instead of wandering aimlessly, the shopper has a clear physical destination.
Central islands dictate customer movement by forcing a circular flow known as the racetrack layout. This layout increases dwell time. It naturally exposes shoppers to surrounding wall cases as they navigate around the center fixture. You control the pace of the shopping experience by strategically placing these physical anchors. When customers walk in a loop, they view perimeter merchandise from multiple angles, increasing the likelihood of secondary purchases.
Visual merchandising hierarchy relies on focal points. You should utilize the island as the store’s primary anchor point. It is the ideal location for high-margin collections, bridal sets, or exclusive designer collaborations. Placing premium items in the center signals their importance to the buyer. You separate the elite inventory from the standard perimeter stock, creating a physical distinction that justifies higher price points.
Island configurations create a 360-degree sales environment. They shift the dynamic from the traditional barrier of linear counters. Staff can adopt a side-by-side, consultative sales approach. Standing next to the client builds trust and removes the adversarial feeling of a traditional sales counter. This method is highly effective when working with high-net-worth clients evaluating significant purchases, as it feels more like a collaborative selection process than a hard sell.
Calculating the necessary footprint is your first operational step. Stores under 800 square feet should generally avoid full-scale island configurations. Small spaces easily become overcrowded. An oversized fixture restricts movement and creates a claustrophobic environment. You must measure the total available floor space before committing to a central unit. A standard island requires at least a 6-by-6-foot footprint, plus an absolute minimum of 36 inches of clearance on all four sides to meet basic accessibility standards.
Line-of-sight and security are non-negotiable factors. You must evaluate how a central fixture impacts visibility across the room. The store entrance, wall displays, and security cameras must remain unobstructed. Tall center displays or bulky signage create blind spots for staff and cameras, providing cover for shoplifters. Employ strategies for maintaining clear sightlines. Utilizing low-profile glass profiles and keeping the overall height under 42 inches keeps the visual field open across the room.
Integration with existing fixtures requires careful planning. You must balance the visual weight of the island with perimeter displays. A cohesive layout strategy prevents a cluttered aesthetic. If wall cases are heavy and dark, a lighter, glass-heavy center island can provide necessary contrast. The goal is spatial harmony. You want the center fixture to stand out without making the rest of the store look like an afterthought.
Tape out the exact dimensions of the proposed island on your store floor using painter's tape.
Walk the perimeter of the taped area to test the aisle width during peak traffic simulations.
Check the sightlines from the manager's desk and the primary point-of-sale station to ensure no blind spots exist.
Review your security camera feeds to confirm the new fixture will not block the view of the entrance or high-value wall cases.
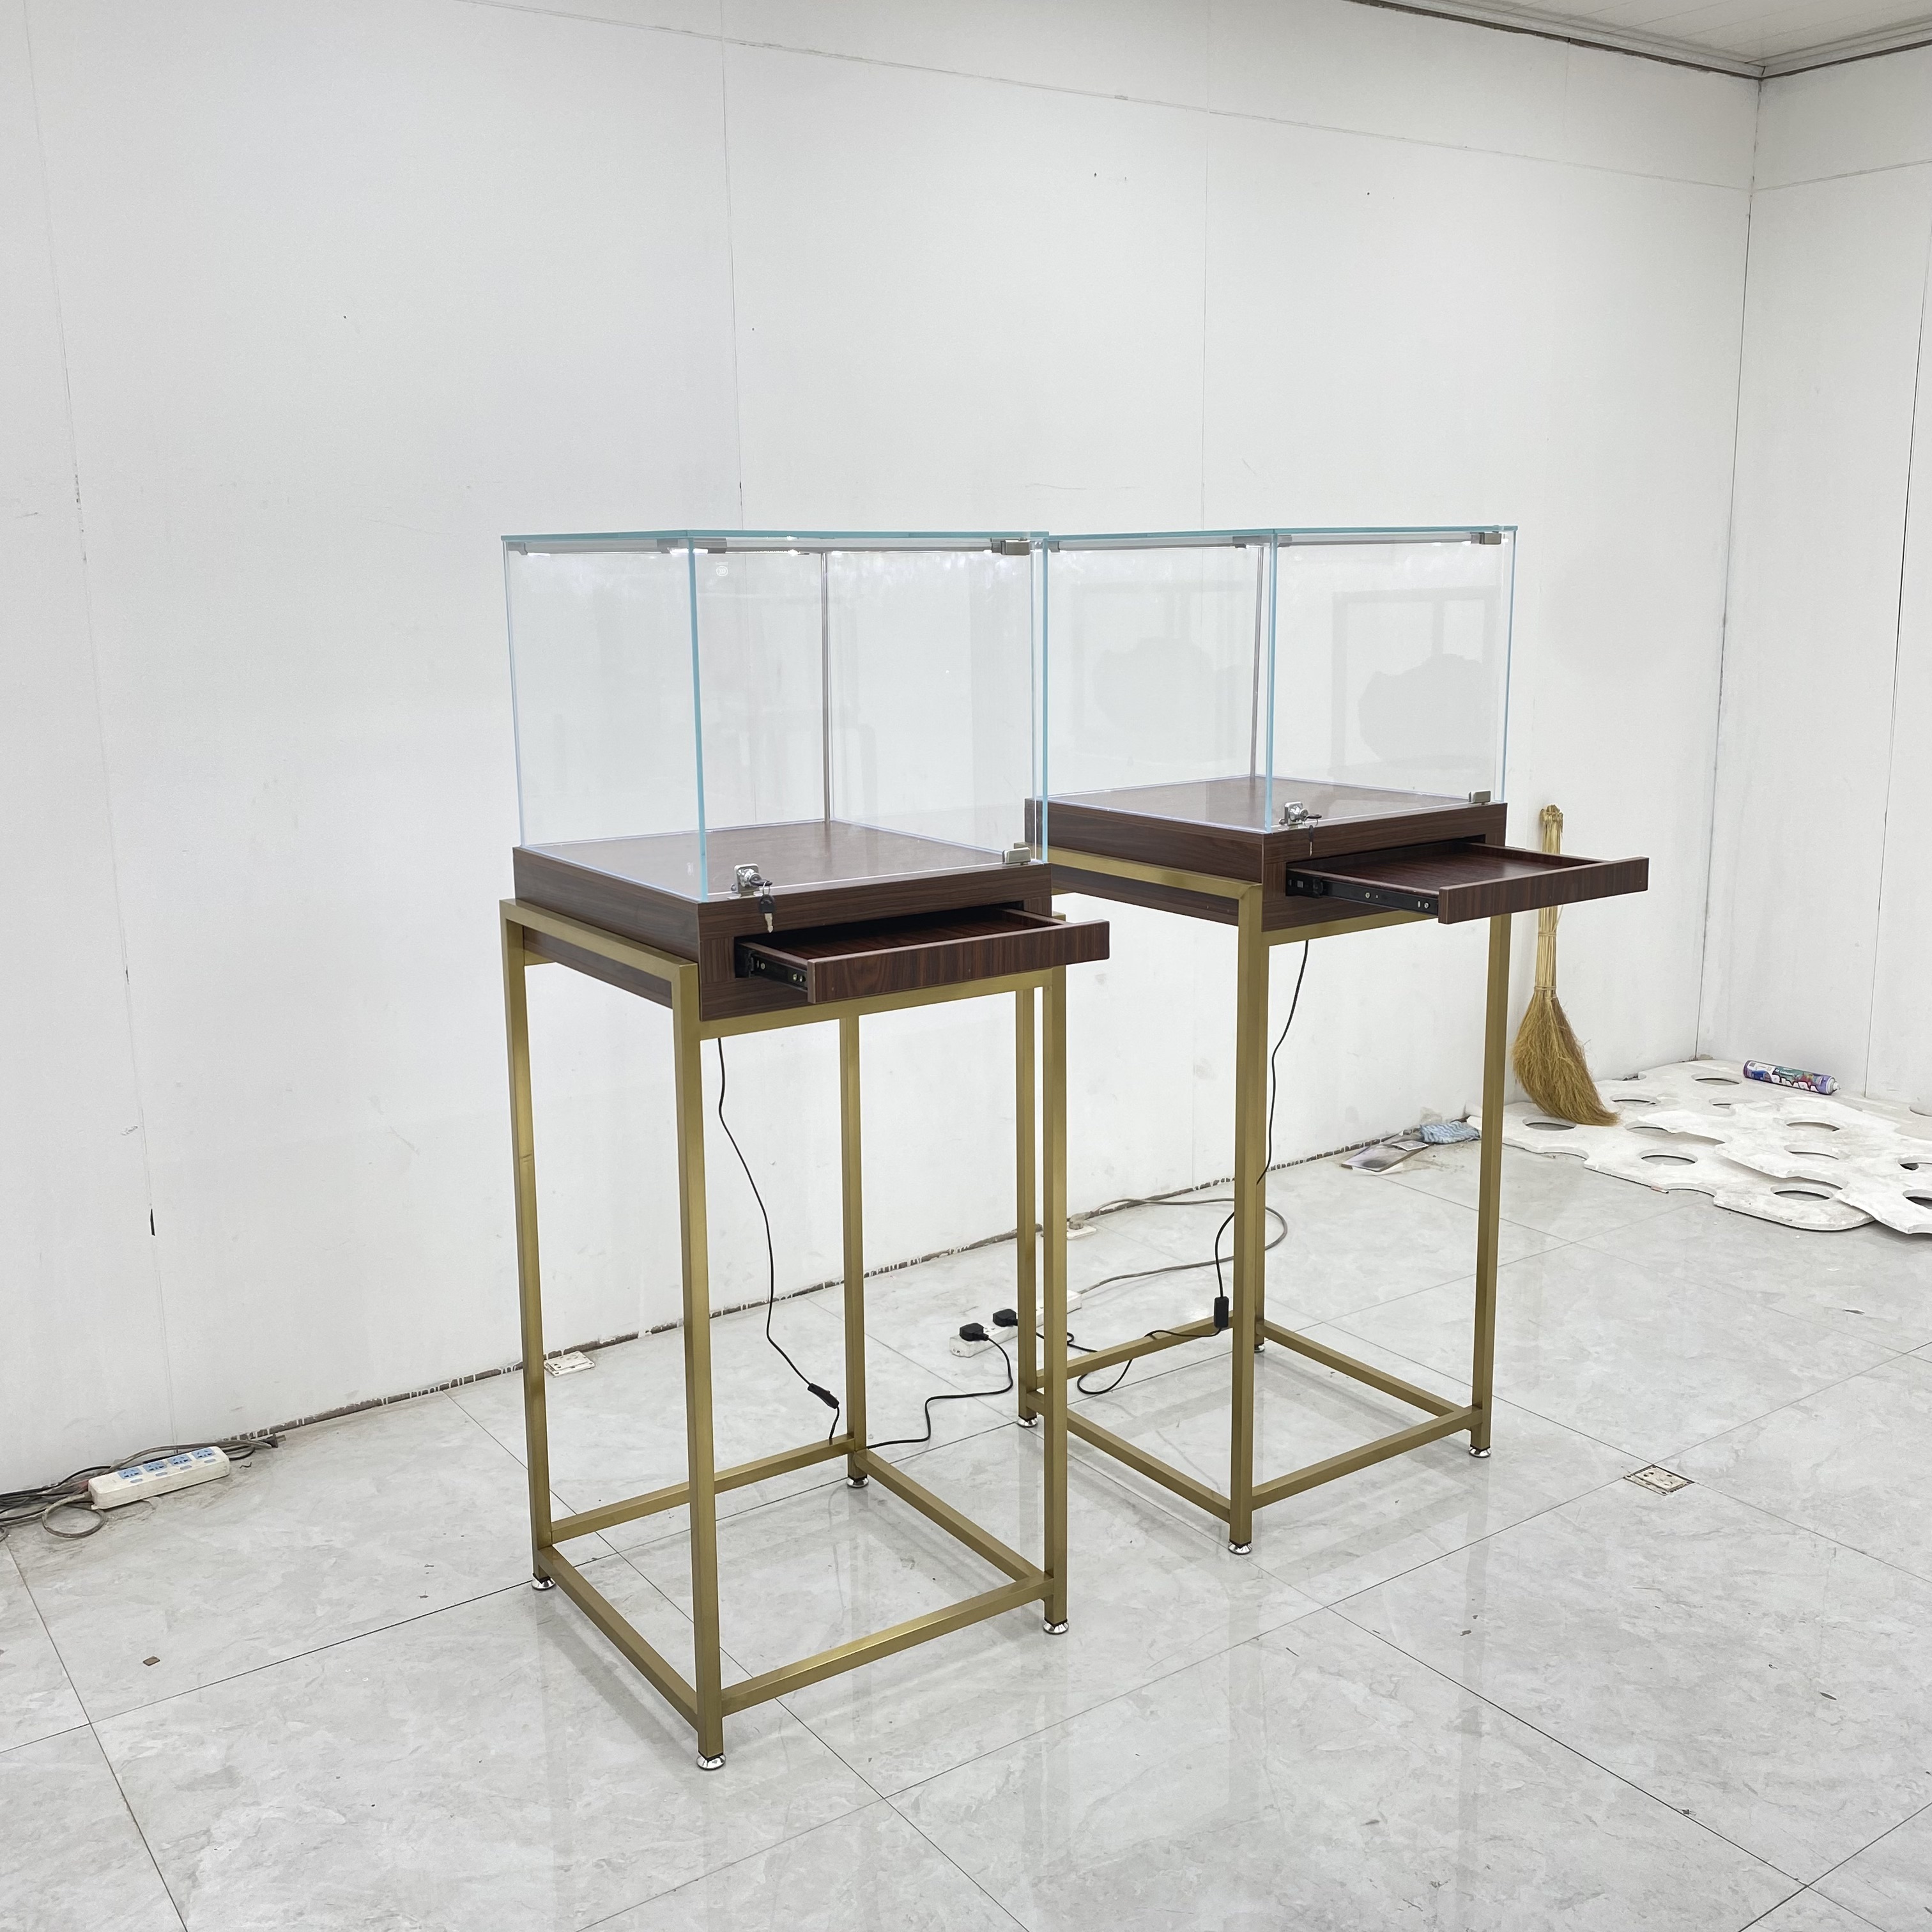
Different shapes serve different operational goals. Selecting the wrong shape for your workflow will frustrate your staff and slow down transaction times. Below is a comparison of common island configurations and their practical applications on the sales floor.
Shape Configuration | Primary Best Use | Operational Advantage | Main Trade-off |
|---|---|---|---|
U-Shaped | High-security collections, bridal zones | Creates a secure, enclosed staff area | Requires a larger overall footprint |
Fan-Shaped | Organic layouts, corner transitions | Guides foot traffic naturally without stops | Complex glass bending increases costs |
Irregular | Experiential retail, challenging architecture | Maximizes space in non-rectangular rooms | Standard display props may not fit |
This configuration is best for high-security collections and dedicated bridal zones. It is highly effective for single-staff operation. A U shaped jewelry display cabinet defines a clear boundary between the customer and the inventory. The staff member stands inside the U, controlling access to the merchandise from a centralized pivot point.
The primary operational advantage is security. It provides a secure, enclosed staff area. This minimizes the risk of unauthorized access behind the counter. Staff can handle high-value items with greater control. It reduces the chance of grab-and-run thefts during presentations because the customer cannot easily reach around the sides of the open counter.
There are trade-offs to consider. This shape requires a larger overall footprint to accommodate the internal standing area. It also restricts staff mobility compared to open-concept designs. Employees must enter and exit through a single point, which can slow down movement during peak hours if multiple salespeople are trying to access the same zone.
This design is best for organic store layouts and corner transitions. It excels at creating aesthetic focal points in modern retail environments. A fan shaped jewelry display cabinet set breaks away from rigid grid layouts. It offers a softer visual appeal that invites customers to walk along its perimeter.
The operational advantages focus on traffic flow. Curved lines soften harsh architectural features. They naturally guide foot traffic around the display without abrupt stops. Customers tend to follow curves, increasing their exposure to the displayed merchandise. This shape prevents the traffic jams that often occur at the sharp 90-degree corners of traditional square islands.
The trade-offs involve manufacturing complexity. Complex glass bending and joining processes increase production costs. Curved glass requires specialized UV bonding techniques. It is also more difficult to replace if damaged. You must factor in longer lead times for replacement parts if a customer accidentally strikes the glass with a heavy bag or stroller.
This approach is best for avant-garde branding and experiential retail spaces. It solves problems in challenging architectural footprints. If you have structural columns in the center of the room, an irregular jewelry display cabinet can wrap around them effectively, turning an obstacle into a merchandising asset.
The operational advantage is spatial optimization. It maximizes usable space in non-rectangular rooms. It also serves as a unique brand differentiator. Custom angles and asymmetrical designs capture attention and encourage customers to explore the entire fixture. You can design specific facets of the cabinet to point directly toward high-traffic entrance zones.
The main trade-off is standardization. This design is highly dependent on a skilled fabrication team. Furthermore, standard display props and trays may not fit efficiently. You will likely need to commission custom neck forms and ring trays to match the internal angles, which adds to the overall setup cost and complicates seasonal visual merchandising updates.
Lighting integration makes or breaks a jewelry display. You need high-CRI (Color Rendering Index) LED lighting. A CRI above 90 ensures stones and metals look true to color. You must balance color temperature based on the inventory. Use 4000K to 5000K for diamonds to highlight their brilliance and clarity. Use 3000K for gold to enhance its warmth and richness. Managing heat dissipation in a closed glass environment is critical. LED drivers generate heat, and if they are sealed inside a wooden base without proper ventilation, they will fail prematurely and potentially damage sensitive merchandise.
Security hardware must blend with aesthetics. Evaluate concealed pneumatic hinges for smooth operation. Specify pick-resistant mechanical locks for base security. Consider RFID or smart lock integrations for fast staff access. You must ensure the style and quality of visible hardware accessories seamlessly match the luxury aesthetic of the display. Cheap, bulky locks degrade the perception of high-end jewelry. Magnetic locks hidden beneath the wood veneer offer a clean look while maintaining strict access control.
Ergonomics dictate daily operational efficiency. Design the cases for easier jewelry placements, presentation, and removal. Incorporate smooth-glide pull-out decks on heavy-duty ball-bearing tracks. Use wide-angle rear access doors that open a full 180 degrees. These features streamline daily setup and nightly vault storage. Staff should not have to strain, bend awkwardly, or reach blindly into deep corners to retrieve items.
Material durability ensures longevity. Select base materials that withstand high foot traffic. Brushed metal, solid wood, or high-density MDF with commercial-grade veneers are excellent choices. The base must resist scuffing from shopping bags, strollers, and shoes. Incorporating a 4-inch recessed toe kick clad in stainless steel or brushed brass protects the lower edge of the cabinet. A damaged, chipped base ruins the luxury presentation, regardless of the glass quality above it.
Knowing when to specify a custom jewelry display cabinet is a major business decision. Bespoke builds make sense when you need brand-specific finishes. They are necessary for non-standard dimensions. If you require proprietary security integrations, custom fabrication is your only viable route. Modular units force you to adapt your layout to the furniture. Custom units adapt the furniture to your exact operational needs, allowing you to dictate the exact height, depth, and lighting specifications.
Vetting the right partner is critical. When selecting a jewelry display cabinet manufacturer, review their specific fabrication criteria. Check their experience with ultra-clear, low-iron glass. Standard glass has a green tint that distorts jewelry colors, making diamonds look dull. Demand hardware sourcing transparency. Ensure they have the ability to provide detailed 3D CAD renderings prior to fabrication. You need to see exactly how the joints, tracks, and locks will function before signing off on the production run.
Logistics and installation realities require advance planning. Factor in realistic lead times. Custom builds often require 8 to 12 weeks for fabrication, plus transit time. Understand the crating requirements for heavy glass fixtures. You must arrange for professional, on-site assembly. Island cabinets are rarely shipped fully assembled due to weight and fragility. Coordinate with local contractors to handle the final placement, leveling, and electrical connections. If you are installing in a mall, you must also navigate union labor rules and after-hours delivery restrictions.
Ignoring cable management is a costly mistake. Failing to plan floor power supplies results in unsightly extension cords running across pedestrian walkways, creating severe tripping hazards. If you miss this step, you face post-installation concrete trenching or core drilling. This disrupts business, creates massive dust issues, and adds unexpected costs. Always coordinate with a licensed electrician to install floor boxes before ordering center-floor fixtures.
Over-merchandising the focal point degrades the customer experience. Cramming too much inventory into the island results in a jumbled presentation. High-margin centerpieces require negative space. Negative space encourages customers to take their time evaluating individual pieces. Clutter signals discount retail; space signals luxury. Limit the number of trays in the center island to highlight only your most prestigious collections.
Mismatched lighting temperatures create visual disconnects. Using different LED color temperatures in the island showcase versus the perimeter wall cases confuses the eye. It makes the store look disjointed and poorly planned. Ensure your lighting specifications are uniform across all display zones, adjusting only for specific metal or stone requirements within individual cases.
Overcrowding the display area ruins traffic flow. Designing an island that is too large for the space violates the 36-inch ADA clearance rule. It creates a claustrophobic shopping experience. Customers will not linger if they are constantly bumped by other shoppers or staff members. Always prioritize comfortable aisle widths over slightly larger display cases. A smaller, well-lit island performs better than a massive fixture that chokes the sales floor.
Measure your central floor plan accurately to confirm you have the required square footage and a minimum of 36 inches for clearance aisles.
Hire a licensed structural engineer or electrician to verify floor power access and core drilling requirements before finalizing any fixture designs.
Map out your staff workflow and daily vault transfer routes to select the most efficient cabinet shape for your operations.
Request technical portfolios and 3D CAD renderings from specialized display manufacturers to verify their capability with low-iron glass and concealed hardware.
A: Minimum 36 inches for ADA compliance, though 42 to 48 inches is recommended for high-end retail to allow multiple customers to browse comfortably.
A: Power is typically supplied via floor outlets installed through core drilling or concrete trenching prior to fixture installation, ensuring all cables are hidden within the cabinet base.
A: Yes, they create a controlled, staff-only zone that limits customer access to the rear of the cases and allows for safer inventory handling during presentations.
A: Integrated LED strip lighting or adjustable micro-spotlights with a high CRI (>90). Diamonds require cooler temperatures (4500K+), while gold benefits from warmer tones (3000K-3500K).
A: Standard viewing height is typically between 38 and 42 inches, allowing customers to view the merchandise comfortably without excessive bending, while maintaining a clear line of sight across the store.
A: Costs vary widely based on size, materials, and security features. Custom island configurations depend heavily on the manufacturer, specific glass requirements, and integrated smart locking systems.


